[ELK Stack] elastic인지 fantastic인지 설치 좀 해봐라

elasticsearch 게시물들 하나같이 이해 안 되는 빡대가리가 만드는 elasticsearch 설치와 사용 일대기.
0. 기본 설정
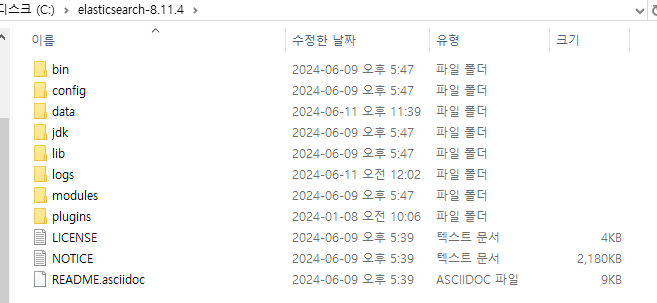
- 윈도우 zip 파일로 설치했음.
- 버전은 엘라스틱서치, 로그스태시, 키바나 전부 8.11.4로 설치함.
- 알아서 깔고 C드라이브 바로 아래에 압축해제.
https://www.elastic.co/kr/downloads/elasticsearch
Download Elasticsearch
Download Elasticsearch or the complete Elastic Stack (formerly ELK stack) for free and start searching and analyzing in minutes with Elastic....
www.elastic.co
https://www.elastic.co/kr/downloads/kibana
Download Kibana Free | Get Started Now
Download Kibana or the complete Elastic Stack (formerly ELK stack) for free and start visualizing, analyzing, and exploring your data with Elastic in minutes....
www.elastic.co
https://www.elastic.co/kr/downloads/logstash
Download Logstash Free | Get Started Now
Download Logstash or the complete Elastic Stack (formerly ELK stack) for free and start collecting, searching, and analyzing your data with Elastic in minutes....
www.elastic.co
1. elasticsearch 설치
1-1. /config/elasticsearch.yaml 파일 수정
c드라이브 아래 elastisearch 들어가면 config 파일 보일 거임. 거기 들어가서 파일 내용을 아래처럼 수정하기.
물론 security.enabled: false로 해놓는 건 좋은 선택이 아님. 나는 걍 미니프젝용으로 하는 거라 그냥 false로 함.
# ======================== Elasticsearch Configuration =========================
#
# NOTE: Elasticsearch comes with reasonable defaults for most settings.
#       Before you set out to tweak and tune the configuration, make sure you
#       understand what are you trying to accomplish and the consequences.
#
# The primary way of configuring a node is via this file. This template lists
# the most important settings you may want to configure for a production cluster.
#
# Please consult the documentation for further information on configuration options:
# https://www.elastic.co/guide/en/elasticsearch/reference/index.html
#
# ---------------------------------- Cluster -----------------------------------
#
# Use a descriptive name for your cluster:
#
#cluster.name: my-application
#
# ------------------------------------ Node ------------------------------------
#
# Use a descriptive name for the node:
#
#node.name: node-1
#
# Add custom attributes to the node:
#
#node.attr.rack: r1
#
# ----------------------------------- Paths ------------------------------------
#
# Path to directory where to store the data (separate multiple locations by comma):
#
#path.data: /path/to/data
#
# Path to log files:
#
#path.logs: /path/to/logs
#
# ----------------------------------- Memory -----------------------------------
#
# Lock the memory on startup:
#
#bootstrap.memory_lock: true
#
# Make sure that the heap size is set to about half the memory available
# on the system and that the owner of the process is allowed to use this
# limit.
#
# Elasticsearch performs poorly when the system is swapping the memory.
#
# ---------------------------------- Network -----------------------------------
#
# By default Elasticsearch is only accessible on localhost. Set a different
# address here to expose this node on the network:
#
# network.host: 192.168.0.1
#
# By default Elasticsearch listens for HTTP traffic on the first free port it
# finds starting at 9200. Set a specific HTTP port here:
#
# http.port: 9200
#
# For more information, consult the network module documentation.
#
# --------------------------------- Discovery ----------------------------------
#
# Pass an initial list of hosts to perform discovery when this node is started:
# The default list of hosts is ["127.0.0.1", "[::1]"]
#
#discovery.seed_hosts: ["host1", "host2"]
#
# Bootstrap the cluster using an initial set of master-eligible nodes:
#
#cluster.initial_master_nodes: ["node-1", "node-2"]
#
# For more information, consult the discovery and cluster formation module documentation.
#
# ---------------------------------- Various -----------------------------------
#
# Allow wildcard deletion of indices:
#
#action.destructive_requires_name: false

#----------------------- BEGIN SECURITY AUTO CONFIGURATION -----------------------
#
# The following settings, TLS certificates, and keys have been automatically
# generated to configure Elasticsearch security features on 09-06-2024 08:42:49
#
# --------------------------------------------------------------------------------

# Enable security features
# xpack.security.enabled: true

# xpack.security.enrollment.enabled: true

# # Enable encryption for HTTP API client connections, such as Kibana, Logstash, and Agents
# xpack.security.http.ssl:
#   enabled: true
#   keystore.path: certs/http.p12

# # Enable encryption and mutual authentication between cluster nodes
# xpack.security.transport.ssl:
#   enabled: true
#   verification_mode: certificate
#   keystore.path: certs/transport.p12
#   truststore.path: certs/transport.p12
# # Create a new cluster with the current node only
# # Additional nodes can still join the cluster later


#########################################################################
# Enable security features
xpack.security.enabled: false

xpack.security.enrollment.enabled: false

# Enable encryption for HTTP API client connections, such as Kibana, Logstash, and Agents
xpack.security.http.ssl:
  enabled: false
  keystore.path: certs/http.p12

# Enable encryption and mutual authentication between cluster nodes
xpack.security.transport.ssl:
  enabled: false
  verification_mode: certificate
  keystore.path: certs/transport.p12
  truststore.path: certs/transport.p12

#################################################################


cluster.initial_master_nodes: ["Hee"]

# Allow HTTP API connections from anywhere
# Connections are encrypted and require user authentication
http.host: 0.0.0.0

# Allow other nodes to join the cluster from anywhere
# Connections are encrypted and mutually authenticated
#transport.host: 0.0.0.0

#----------------------- END SECURITY AUTO CONFIGURATION -------------------------
1-2. cmd창에 명령어 입력
cmd 창에서 elasticsearch 경로까지 이동.
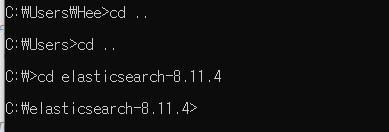
그리고 다음 명령어 입력. 참고로 cmd 창에 복붙하고 싶으면. ctrl+c하고 shift+insert 키누르면 됨.
.\bin\elasticsearch.bat
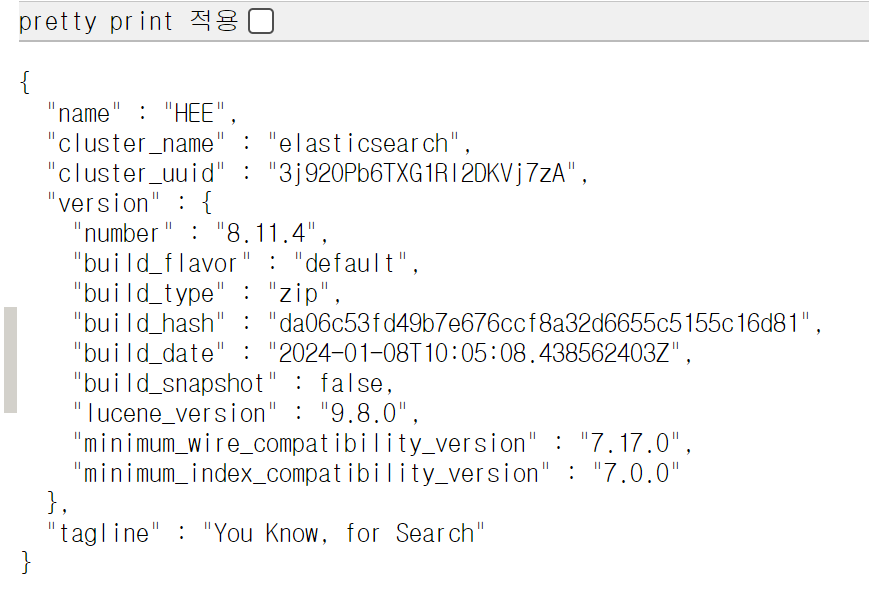
좀 기다리면 see logs for more detils 뭐 어찌구하면서 뭐가 나올거임. 그때 웹 창에다가 아래 주소 입력.
http://localhost:9200/?pretty
이케 나오면 잘 된 거임.
혹시 안 나오면 localhost를 127.0.0.1로 바꿔서 실행해보길. 조삼모사긴 한데. 나는 처음에 localhost로 안 됐었음.
2. kibana 설치
2-1. /config/kibana.yaml 파일 수정
키바나도 설치한 파일 들어가 kibana.yaml 파일 아래처럼 수정.
# For more configuration options see the configuration guide for Kibana in
# https://www.elastic.co/guide/index.html

# =================== System: Kibana Server ===================
# Kibana is served by a back end server. This setting specifies the port to use.
server.port: 5601

# Specifies the address to which the Kibana server will bind. IP addresses and host names are both valid values.
# The default is 'localhost', which usually means remote machines will not be able to connect.
# To allow connections from remote users, set this parameter to a non-loopback address.
server.host: "localhost"

# Enables you to specify a path to mount Kibana at if you are running behind a proxy.
# Use the `server.rewriteBasePath` setting to tell Kibana if it should remove the basePath
# from requests it receives, and to prevent a deprecation warning at startup.
# This setting cannot end in a slash.
#server.basePath: ""

# Specifies whether Kibana should rewrite requests that are prefixed with
# `server.basePath` or require that they are rewritten by your reverse proxy.
# Defaults to `false`.
#server.rewriteBasePath: false

# Specifies the public URL at which Kibana is available for end users. If
# `server.basePath` is configured this URL should end with the same basePath.
#server.publicBaseUrl: ""

# The maximum payload size in bytes for incoming server requests.
#server.maxPayload: 1048576

# The Kibana server's name. This is used for display purposes.
#server.name: "your-hostname"

# =================== System: Kibana Server (Optional) ===================
# Enables SSL and paths to the PEM-format SSL certificate and SSL key files, respectively.
# These settings enable SSL for outgoing requests from the Kibana server to the browser.
server.ssl.enabled: false
#server.ssl.certificate: /path/to/your/server.crt
#server.ssl.key: /path/to/your/server.key

# =================== System: Elasticsearch ===================
# The URLs of the Elasticsearch instances to use for all your queries.
elasticsearch.hosts: ["http://localhost:9200"]

# If your Elasticsearch is protected with basic authentication, these settings provide
# the username and password that the Kibana server uses to perform maintenance on the Kibana
# index at startup. Your Kibana users still need to authenticate with Elasticsearch, which
# is proxied through the Kibana server.
elasticsearch.username: "kibana_system"
elasticsearch.password: "pass"

# Kibana can also authenticate to Elasticsearch via "service account tokens".
# Service account tokens are Bearer style tokens that replace the traditional username/password based configuration.
# Use this token instead of a username/password.
# elasticsearch.serviceAccountToken: "my_token"

# Time in milliseconds to wait for Elasticsearch to respond to pings. Defaults to the value of
# the elasticsearch.requestTimeout setting.
#elasticsearch.pingTimeout: 1500

# Time in milliseconds to wait for responses from the back end or Elasticsearch. This value
# must be a positive integer.
#elasticsearch.requestTimeout: 30000

# The maximum number of sockets that can be used for communications with elasticsearch.
# Defaults to `Infinity`.
#elasticsearch.maxSockets: 1024

# Specifies whether Kibana should use compression for communications with elasticsearch
# Defaults to `false`.
#elasticsearch.compression: false

# List of Kibana client-side headers to send to Elasticsearch. To send *no* client-side
# headers, set this value to [] (an empty list).
#elasticsearch.requestHeadersWhitelist: [ authorization ]

# Header names and values that are sent to Elasticsearch. Any custom headers cannot be overwritten
# by client-side headers, regardless of the elasticsearch.requestHeadersWhitelist configuration.
#elasticsearch.customHeaders: {}

# Time in milliseconds for Elasticsearch to wait for responses from shards. Set to 0 to disable.
#elasticsearch.shardTimeout: 30000

# =================== System: Elasticsearch (Optional) ===================
# These files are used to verify the identity of Kibana to Elasticsearch and are required when
# xpack.security.http.ssl.client_authentication in Elasticsearch is set to required.
#elasticsearch.ssl.certificate: /path/to/your/client.crt
#elasticsearch.ssl.key: /path/to/your/client.key

# Enables you to specify a path to the PEM file for the certificate
# authority for your Elasticsearch instance.
#elasticsearch.ssl.certificateAuthorities: [ "/path/to/your/CA.pem" ]

# To disregard the validity of SSL certificates, change this setting's value to 'none'.
#elasticsearch.ssl.verificationMode: full

# =================== System: Logging ===================
# Set the value of this setting to off to suppress all logging output, or to debug to log everything. Defaults to 'info'
#logging.root.level: debug

# Enables you to specify a file where Kibana stores log output.
#logging.appenders.default:
#  type: file
#  fileName: /var/logs/kibana.log
#  layout:
#    type: json

# Logs queries sent to Elasticsearch.
#logging.loggers:
#  - name: elasticsearch.query
#    level: debug

# Logs http responses.
#logging.loggers:
#  - name: http.server.response
#    level: debug

# Logs system usage information.
#logging.loggers:
#  - name: metrics.ops
#    level: debug

# =================== System: Other ===================
# The path where Kibana stores persistent data not saved in Elasticsearch. Defaults to data
#path.data: data

# Specifies the path where Kibana creates the process ID file.
#pid.file: /run/kibana/kibana.pid

# Set the interval in milliseconds to sample system and process performance
# metrics. Minimum is 100ms. Defaults to 5000ms.
#ops.interval: 5000

# Specifies locale to be used for all localizable strings, dates and number formats.
# Supported languages are the following: English (default) "en", Chinese "zh-CN", Japanese "ja-JP", French "fr-FR".
#i18n.locale: "en"

# =================== Frequently used (Optional)===================

# =================== Saved Objects: Migrations ===================
# Saved object migrations run at startup. If you run into migration-related issues, you might need to adjust these settings.

# The number of documents migrated at a time.
# If Kibana can't start up or upgrade due to an Elasticsearch `circuit_breaking_exception`,
# use a smaller batchSize value to reduce the memory pressure. Defaults to 1000 objects per batch.
#migrations.batchSize: 1000

# The maximum payload size for indexing batches of upgraded saved objects.
# To avoid migrations failing due to a 413 Request Entity Too Large response from Elasticsearch.
# This value should be lower than or equal to your Elasticsearch cluster’s `http.max_content_length`
# configuration option. Default: 100mb
#migrations.maxBatchSizeBytes: 100mb

# The number of times to retry temporary migration failures. Increase the setting
# if migrations fail frequently with a message such as `Unable to complete the [...] step after
# 15 attempts, terminating`. Defaults to 15
#migrations.retryAttempts: 15

# =================== Search Autocomplete ===================
# Time in milliseconds to wait for autocomplete suggestions from Elasticsearch.
# This value must be a whole number greater than zero. Defaults to 1000ms
#unifiedSearch.autocomplete.valueSuggestions.timeout: 1000

# Maximum number of documents loaded by each shard to generate autocomplete suggestions.
# This value must be a whole number greater than zero. Defaults to 100_000
#unifiedSearch.autocomplete.valueSuggestions.terminateAfter: 100000
2-2. cmd창에 명령어 입력
키바나도 똑같이 경로 찾아서 아래 명령어 입력.
.\bin\kibana.bat
그럼 cmd창에 뭐가 좌라락 올라감. 시간이 좀 걸림.
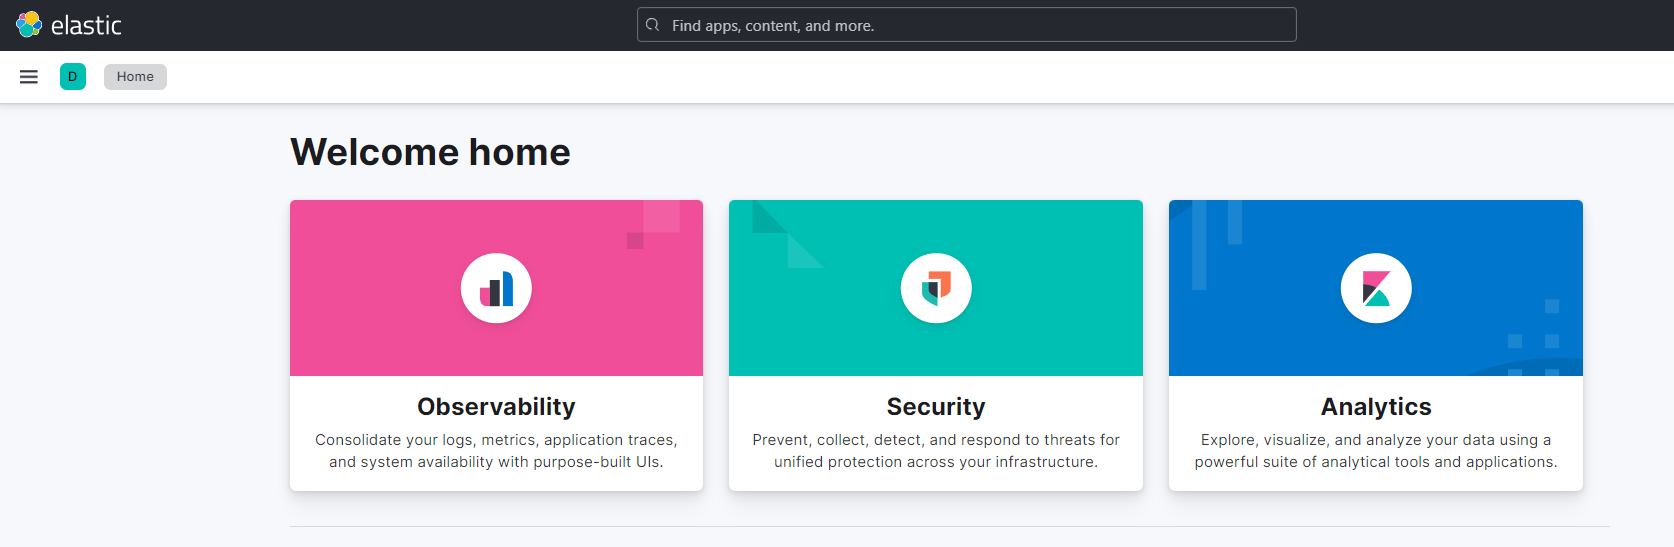
그러다 kibana is now available이라고 뜨면 웹에 아래 처럼 검색.
http://localhost:5601/
그럼 이런 거 뜸. 성공 ㅊㅊ.
3. logstash 설치
이 녀석은 미리 jdk 설치하고 환경변수 설치도 해야 함. 없으면 실행 안 된다고 보면 됨.
3-1. cmd창에 명령어 입력해서 잘 설치 됐는지 확인.
이 녀석은 위에 두 녀석과 다르게 yaml파일을 변경할 필요는 없음.
동일하게 logstash 위치에서. 아래 명령어 입력하고
.\bin\logstash.bat -e "input { stdin {} } output { stdout { }}"
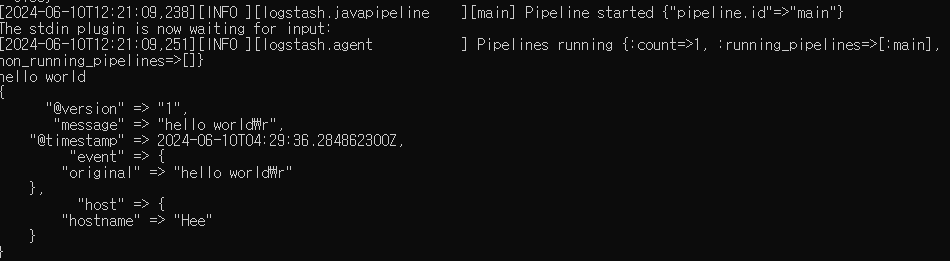
pipelines running 뜨고, 아래 빈칸에서 커서가 깜박거리면, "hello world" 쳐보기. 아래처럼 결과 나오면 잘 된 거임.
3-2. logstash로 파일 업로드 하기
ctrl+c눌러서 위 창 꺼주고.
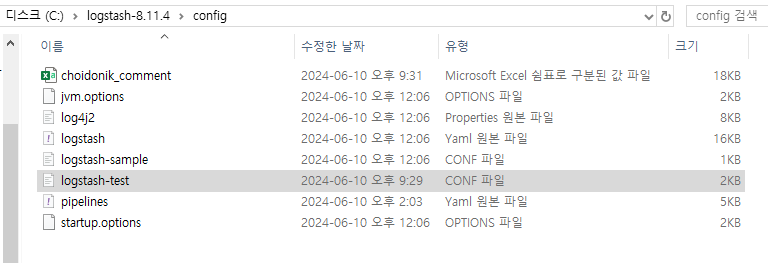
/config 위치에 파이프라인 코드 쓸 .conf 확장자의 파일을 만들어주기. 나는 logstash-test.conf로 만듦.
이건 본인이 원하는 전처리 코드 써야됨. 그냥 예시로 참고하길 바람. 참고로 csv 파일 첫 행은 지워야 함. logstash가 첫 행도 데이터로 읽어버리기 때문. 그리고 인코딩은 utf-8.
# Sample Logstash configuration for creating a simple
# Beats -> Logstash -> Elasticsearch pipeline.

input {
  file {
    path => "C:/logstash-8.11.4/config/test.csv"
    start_position=>"beginning"
  }
}

filter {
  csv {
    separator => ","
    skip_empty_columns => true
    columns => ["idx", "postIdx", "comment", "commentTime"]  # CSV 파일의 컬럼 이름을 지정
  }

  # csv 파일 인덱스와 type 설정
  mutate{convert=>["idx", "string"]}
  mutate{convert=>["postIdx", "string"]}
  mutate{convert=>["comment", "string"]}
  mutate{convert=>["commentTime", "string"]}

}

output {
  elasticsearch {
    action => "index"
    hosts => ["localhost"]
    #  hosts => ["http://localhost:9200"]
    index => "test"
  }
그리고 cmd창에서 아래 명령어 입력. 당연히 cmd에서 logstash 설치된 곳까지 이동해서 실행해야 함.
.\bin\logstash.bat -f .\config\{conf파일 이름}.conf
pipelines running이라고 뜨면 성공인데, 만약 csv파일 넣었으면 해당 문구 아래 csv 파일 값들이 좌라락 떠야함. 근데 안 뜨면, csv파일이랑 conf파일이랑 뭐가 일치하지 않는거임. csv파일 열 3개인데, conf 파일에서는 2개만 입력했다던가..
그리고 cmd창에서 elasticsearch 위치까지 간 다음에 아래 명령어 입력.
curl -XPUT localhost:9200/{conf파일 output에 쓴 index 이름 쓰기}
curl -XPUT localhost:9200/test
만약에 이런 에러가 뜨면 elasticsearch에 이미 업로드 된 index니까 제거하고 다시 실행.

curl -XDELETE localhost:9200/test
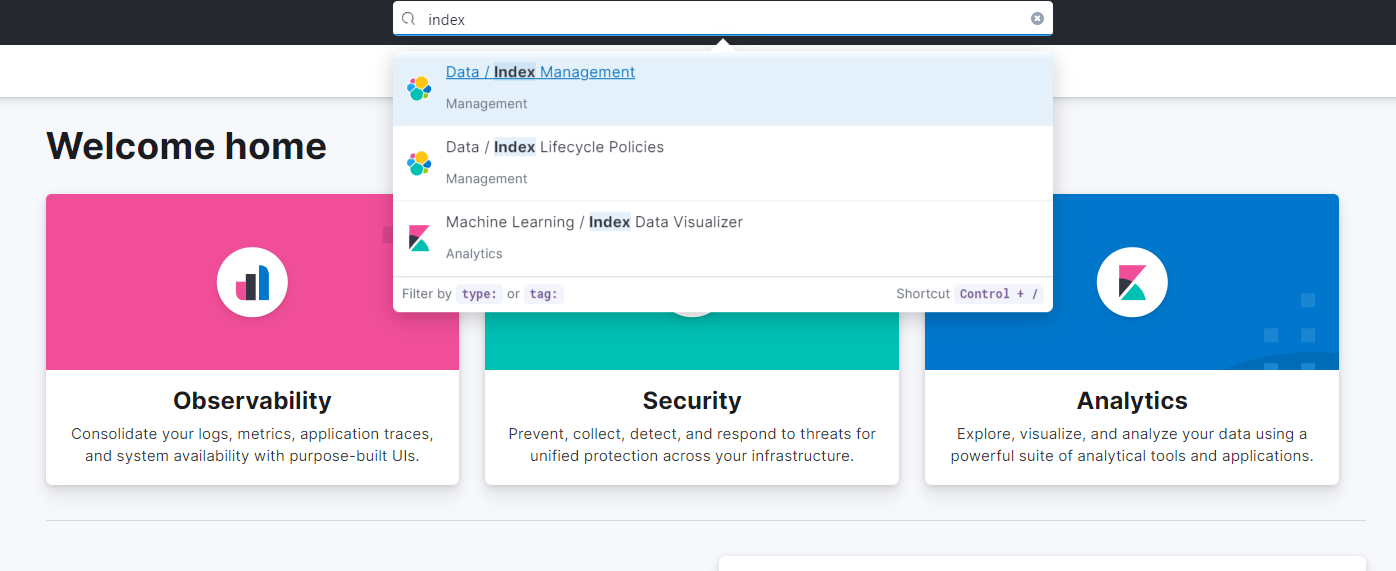
생성된 index는 kibana에서 index 검색하고 들어가면 볼 수 있음.
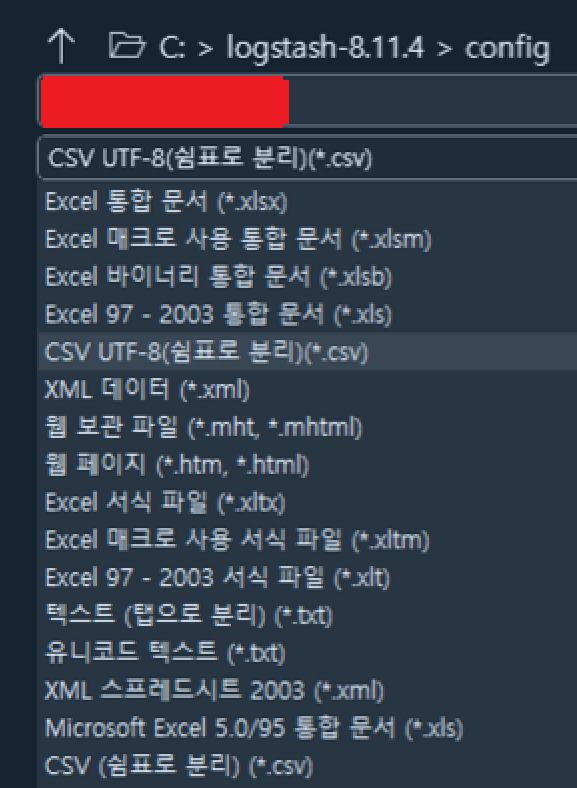
근데!! 한글 인코딩이 계속 깨진다!!! csv 인코딩 utf-8로 했는데도 깨진다!!! utf-8(쉼표로 분리)(*.csv)햇는데도 안 된다!!!!!
그럼 컴퓨터를 껐다 켜보세요. 너무 황당한 답변이라고요? 제가 인코딩 계속 깨져서 별ㅈㄹ을 다 해봤는데 이게 직빵이었습니다.
4. 외부 접속 허용: nginx
외부에서 elasticsearch 보이게 하고 싶다면 이 방법 추천. 웹서버임.
https://nginx.org/en/download.html
nginx: download
nginx.org
이거 C드라이브 아래에 설치하고.
설치한 폴더 한>conf>nginx.conf 파일을 아래처럼 수정.
events {
    worker_connections 1024;
}

http{
    server {
            listen 80;
            listen [::]:80;

            server_name localhost;

            location /elasticsearch/ {
                    proxy_pass http://localhost:9200/;
                    proxy_redirect off;
                    proxy_http_version 1.1;
                    proxy_set_header Upgrade $http_upgrade;
                    proxy_set_header Connection 'Keep-Alive';
                    proxy_set_header Proxy-Connection 'Keep-Alive';
                    proxy_set_header Host $host;
                    proxy_cache_bypass $http_upgrade;
            }

            location /kibana/ {
                    proxy_pass http://localhost:5601/;
                    proxy_redirect off;
                    proxy_http_version 1.1;
                    proxy_set_header Upgrade $http_upgrade;
                    proxy_set_header Connection 'Keep-Alive';
                    proxy_set_header Proxy-Connection 'Keep-Alive';
                    proxy_set_header Host $host;
                    proxy_cache_bypass $http_upgrade;
            }

    }
}
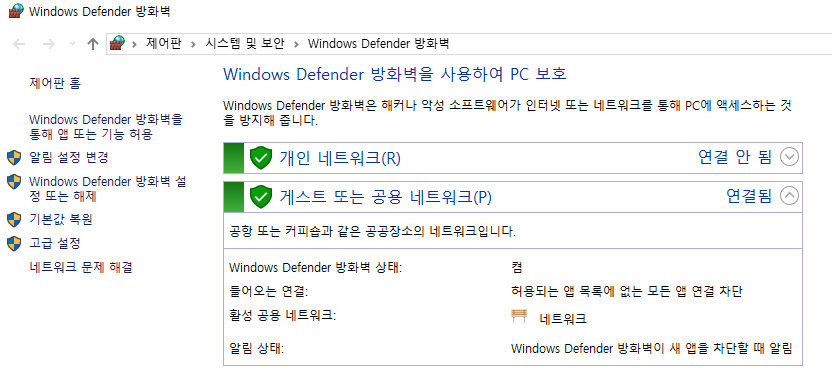
그리고 80번 포트 안 뚫어놨으면 뚫어놓기. 대충 방화벽>고급설정>인바운드 규칙>새규칙 추가하면 됨.
이러고 또 cmd창 열고 nginx 위치까지 가서 실행하면 됨. 명령어는 아래와 같음.
nginx   # 실행
nginx -s stop  # 정지
nginx -s reload #재실행
그러고 웹에다가 localhost/kibana 하면 뜸. 만약 안 뜨면 localhost:5601/하면 뜰거임.